🔧 Upgrade Your Print Precision!
This 2-Pack of CR10 Z Axis T8 Anti Backlash Spring Loaded Nut Elimination Gap Brass Nuts is designed for 3D printers like the Ender 3 series and CR-10 Tornado. With an 8mm lead screw diameter and 2mm pitch, these durable brass nuts enhance printing accuracy and reliability, making them an essential upgrade for any serious 3D printing enthusiast.
M**E
Don't think these are plug and play....Do not loosen the lead screw nut screws!
The media could not be loaded. This lead screw nut is too long to expect it to bolt right in and work 100% of the time. It will work with everything tight though, I even attached a picture of the screws being tight and a video showing there is no binding. If you need to loosen anything and leave it loose you need to address the problem with the printer not blame the nuts....don't be a hack...Loosing the screws that hold in this nuts is NOT the solution. If you are loosing the lead screw nuts screws to reduce/eliminate binding then you effectively just moved the slop in the nut to slop in the screws.First when you install these nuts, they will feel very tight almost like the thread pitch is wrong, it is not. Just use a bit of force the thread pitch is fairly steep it will be difficult to actually cross them them. Its brass so it will conform to the steel lead screw. Dry fit them on the lead screw off the printer and verify you can spin the assembled nut up and down the lead screw. Once you verify that you know it works and other problems need to be addressed separately.With the lead screw off, the gantry should want to slam into the printer bed. If it doesn't you need to adjust the rollers on it so it does. But you want to also want to verify the they aren't too loose. There is a step at the end I use to perfect this adjustment. If the gantry binds at certain points you need to loosen the vertical rails from the base of the machine, move the gantry to the bottom and retighten it. That will insure the spacing is good. Then loose the vertical rails at the top move the gantry to the top and retighten them.This is the most critical and difficult step. When you install the lead screw into the nut when it clears the nut by a 1/4" or so make sure you have the gantry as low as it will go and thread in the lead screw the rest of the way. It needs to be perfectly aligned with the z dimension stepper motor and freely drop into the coupling. If it does not then you can expect it to bind.To correct that sometimes its simple. Run the lead screw into the z dimension coupler and loosen the screws on the lead screw nut, wiggle everything and retighten them. Then loosen where the stepper bolts to the rail (horizontal screws) wiggle everything and retighten them.Worst case the bracket holding the screw screw nut (near the x dimension step) might need a slight tweak to make sure its pointing precisely at the stepper.Back to the rollers I mentioned above.. Tighten them to the point there is no slop but you can still force one wheel to spin against the rail. One of them should be able to spin with a bit of effort freely. This way you know it has good pressure to hold tight but not so tight its producing friction.I've used tons of these nuts and some printers they work with no effort, others have annoying required all the above steps.
I**R
Easy to install and fits well.
I had occasional problems with the x-axis dropping after disabling the z-axis stepper motor. The device fit my Ender 3 printer nicely and was not difficult to install. I have not observed any z-axis slippage since installing the device, but it has not been installed long enough to be sure.
P**L
Tight fit at first.
Fits the stock z-axis bracket fine, but had a slight fitment issue with my second z-axis bracket. Filed the holes a bit bigger on the second bracket and it fit fine.Nuts might seem like they dont fit the lead screws at first. May take some persuasion to get them to seat into the threads on the lead screws.
J**S
Worked perfectly on my Ender 3
This worked perfectly on my Ender 3 to keep the gantry from dropping whenever the stepper motors disengaged. In this sense it was a life saver. The reason for one star off is that the threads are rough and getting it on to the z-axis screw was a PITA. It kept catching and binding no matter how gentle I was with threading it on. I ended up having to grease the inside of the threads on both pieces of the anti-backlash ends and even then I had to push with some solid pressure past the point where it started binding. Once I got past that (about 2-3 turns) it threaded on smoothly as if it never had a problem. This made installation frustrating. Install took about 20 minutes. Should have been 5-10.In the end though it works great and does exactly what it was designed to do. Haven't had a single drop on the gantry since installing. Only downside is that when I disable my stepper motors, I can't move it up and down the z-axis by hand anymore. It's a bummer, but I'd much rather have it be stable.Despite my frustrations, it's still a good deal and would definitely buy one for any future printer.
M**E
No more z axis issue
I have a Neptune4 pro and this fits perfect. I used a few YouTube videos to show how to remove the printer to add them.I have no issues now with much movements in my Z axis
Z**S
Threads to far apart to match their own product.
I bought both the nuts and an oldham coupling and spent 2 hours trying to get the screws in to the nut from the oldham coupling. The first issue is that there was NO instructions and no included screws, but even after I looked at a different brands listing to see how they worked, I realized the reason I had been struggling was because the screw holes on the nuts were farther apart then the oldham coupling openings. Frustrated and impatient, I clamped down on the two parts with pliers and forced the screws in and got it together. Mostly because I didn't want to go to the hassle of sending it back and most of these seem to have people listing the same issue. However, these are some of the more expensive ones and I don't see any reason to spend the money. Buy cheaper!
T**A
An Excellent Upgrade
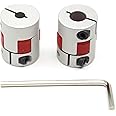
The media could not be loaded. I installed these along with Oldham Couplings and Fixed bearing blocks, and with the back lash nuts, and the other two upgrades, it has improved my prints 100%. The machining quality is great. One thing, when compressing the backlash nut to install on the lead screw, make sure you have a firm grip on it. Mine slipped and the spring shot off and landed on the other side of the room. Took me an hour to find it. LOLHighly Recommend this upgrade for anyone who wants to eliminate slop and backlash on their lead screws.
R**H
A good part to use but you need others too
At first install there was nothing but problems on my ender 3 pro. This thing locked it up right and the stepper just stuttered. This part is just one of a few needed to improve the ender 3 pro, you should probably do a whole set of things at once. To get it to all work out. 1 you need to space and measure the lead screw along the vertical rail. 2 the coupler used is junk for alignment issues, get one of the spiral cut ones. 3 use a Z stepper shield to keep junk out of the z steppers bearing well AND to space the coupler. Drop the coupler right down on the spacer. 4 use a ball bearing between the lead screw and the stepper shaft. Once I did all this my z moves freely and more accurately now. Search thingiverse Basstronics for my parts noted above.
Trustpilot
5 days ago
4 days ago