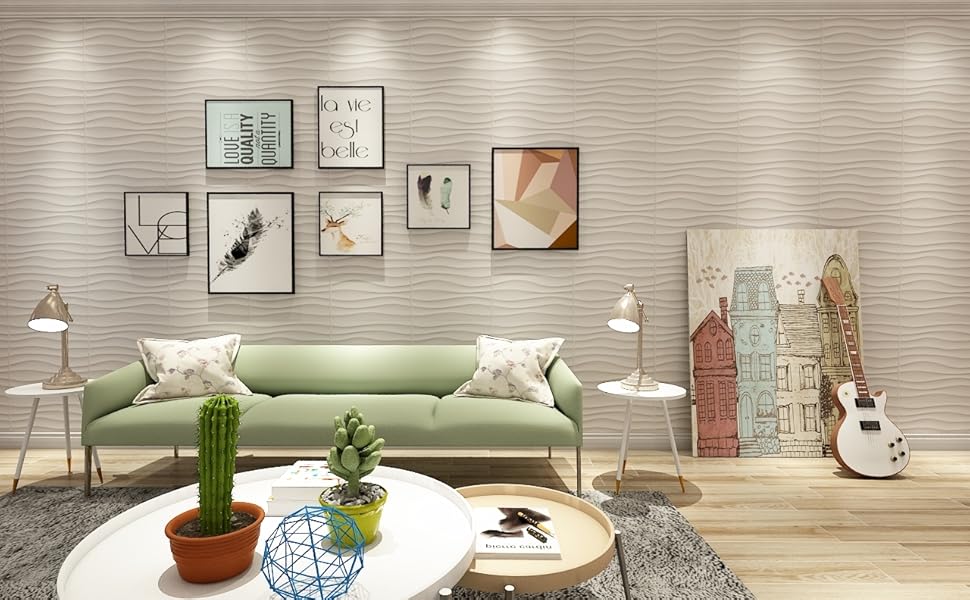
🌊 Ride the wave of modern interiors with Art3d’s sleek 3D wall panels!
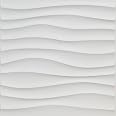
Art3dPlastic 3D Wall Panel PVC Wave Wall Design offers 12 lightweight, fire-resistant panels measuring 19.7" x 19.7" each, covering 32 sq ft per box. Made from durable PVC with a matte white finish, these easy-to-install panels elevate any indoor space with a contemporary wave pattern, backed by ClimatePartner certification for eco-conscious consumers.


| Manufacturer | Art3d |
| Part Number | A10040 |
| Item Weight | 8.4 pounds |
| Country of Origin | USA |
| Item model number | A10040 |
| Is Discontinued By Manufacturer | No |
| Size | 19.7" x 19.7 Pack of 12 |
| Color | White |
| Style | TV/Movie |
| Finish | Finished |
| Material | Plastic |
| Pattern | Wavy wall panels |
| Shape | Square |
| Thickness | 0.08 Inches |
| Installation Method | glued |
| Item Package Quantity | 1 |
| Number Of Pieces | 12 |
| Outside Diameter | 19.7 Inches |
| Cutting Diameter | 19.7 Inches |
| Coverage | 32 square feet |
| Mounting Type | Wall |
| Special Features | Permanent |
| Usage | Inside |
| Batteries Included? | No |
| Batteries Required? | No |
| Assembled Diameter | 19.7 Inches |
I**E
Brought My Boring Walls To Life!
I recently added the 3D diamond wall panels to my boys’ room, and I have to say, they absolutely loved it! The transformation was incredible. Installing these panels was a breeze thanks to the gorilla glue construction adhesive. It held everything securely in place, ensuring a long-lasting installation. I was delighted to discover how easy it was to install the panels, saving me time and effort. To achieve a seamless finish, I used white caulk to fill any gaps between the panels, and the result was flawless. The walls now have a stunning, three-dimensional look that instantly elevates the room’s overall aesthetic. I couldn’t be happier with this purchase, and I highly recommend these 3D diamond wall panels for anyone looking to add a touch of innovation and style to their space.
M**Y
Easy to install and they look fantastic
I remodeled a guest bedroom and wanted to put in a floating wall with a TV and fireplace. I originally though about doing this wall with a dry stack stone, but it was cost prohibitive and would be messy and time consuming. I'm glad that I went with these 3D panels instead. Everyone who has seen them has been wowed by them. I built the floating wall using 3-1/2" steel studs and covered it in 1/2" OSB. I primed it with white Kilz (so that any gaps in the panels would not be as noticeable) and used double sided carpet tape to adhere the tiles. The tiles look fantastic! If you are going to build a floating wall, I would suggest that you build it to the same dimensions as the number of tiles you plan to use (width and height). I don't think you could find a way to make a cut edge look finished, unless it butts up against and adjoining wall. To cover the edge of the OSB (plywood) I used the plastic drywall finishing edge from the local Big Box hardware store (see the second picture). I left approximately 4 inches of overhang on all sides and mounted these chasing LED's from Amazon https://www.amazon.com/gp/product/B07M9XHYVB/ref=ppx_yo_dt_b_search_asin_title?ie=UTF8&psc=1in these angled channels https://www.amazon.com/gp/product/B01LL3S006/ref=ppx_yo_dt_b_search_asin_title?ie=UTF8&psc=1The TV mount and fireplace are also from Amazon. When building the steel stud wall, I internally braced the TV mount location with wood 2x4" and ran a power cord to that area.I used a table saw to cut the panels for the bottom row, but I could have used a handsaw or really good scissors. These panels are a decent thickness and not flimsy at all. There are microscopic gaps between the panels, but they are only noticeable close up. If you are concerned about the gaps, I would suggest that you mount the panels, then fill the gaps and paint the panels with a paint suitable for plastic. BTW, the electric fireplace puts off quite a bit of heat (mostly forward and up) and it has not affected the tiles at all.
A**R
Kids bedroom accent wall.
Love the end result. Used Powergrab all purpose adhesive to glue to bedroom wall. Used caulk between seams and painted easily. Three coats of paint to get solid look with no more white showing through. Cut easily with household scissors. Son loves it!
C**Z
Beautiful outcome
An easy diy that will elevate your wall decore. There is a learning curve to install, but once you get the hang of it its easy enough. I stabilized the panels with double sided tape and then found itty bitty finishing nails to fasten them to the wall. I was able to align the edges close enough to make it look seamless and didn’t need caulk.
S**M
Economical and Effective - Seam Removal Possible But Tedious
I needed something to cover an 8' X 16' section of bedroom wall and decided to make a "wave wall" instead of hanging artwork. I didn't want visible vertical gaps between tiles, so I trimmed 1mm from each side of every tile using a 10" table saw and Diablo 84 tooth blade. When doing this, tiles must be held firmly near the blade to prevent oscillation and chipping. Tiles were affixed with Sherwin Williams 1050QD caulk (thanks to another reviewer for the suggestion), which is very sticky. Care must be taken to apply sufficient caulk to all areas of tile that touch the wall (particularly the edges), or you will run into flexing problems along the edges. As you can see, I cut tiles such that they fit around a power outlet, 3-gang wall switch, and even cover the bedroom door! All seams were dressed with spackle and sanded with 220 grit, with this step being repeated multiple times (whew!) until the wall was eye clean. All tile surfaces were then lightly sanded with 220 grit, then given two coats of KILZ "Adhesion" primer (find on Amazon), which works great for painting PVC. The paint is three coats of Benjamin Moore Regal Flat White latex. Both primer and paint were brush applied and the result is virtually perfect. Mounted about 6" from the wall surface with shelving brackets is an aluminum "L" rail containing two high density 5050 LED strips with variable color and remote. This provides enough light for striking illumination in both day and night settings.
A**.
Beautiful wall
Came out beautiful! My husband used liquid nail to hold them to the wall.
J**E
Lightweight and simple
Easy to install and work great with accent lighting.We just used double sided tape and a Govee light rope.Edit: after a series of very warm days, the double-sided tape I used ended up not being sufficient. Using some sort of silicone will be a better option
J**.
Durable
Haven’t used these yet but they are very high quality. May be difficult to cut with a regular blade
Trustpilot
3 weeks ago
3 days ago